Building a Tip Calculator With JS

Passionate React.js Developer with 2 years of hands-on experience in building responsive web applications. Proficient in creating efficient, reusable, and scalable components using React.js. Skilled in front-end technologies such as HTML5, CSS3, and JavaScript. Experienced in integrating RESTful APIs and working with state management libraries like Redux. Strong understanding of modern web development practices and tools. Committed to delivering high-quality code and exceptional user experiences. Open to new challenges and eager to contribute to innovative projects. Let's connect and discuss how we can collaborate on exciting opportunities! #ReactJS #FrontEndDeveloper #WebDevelopment
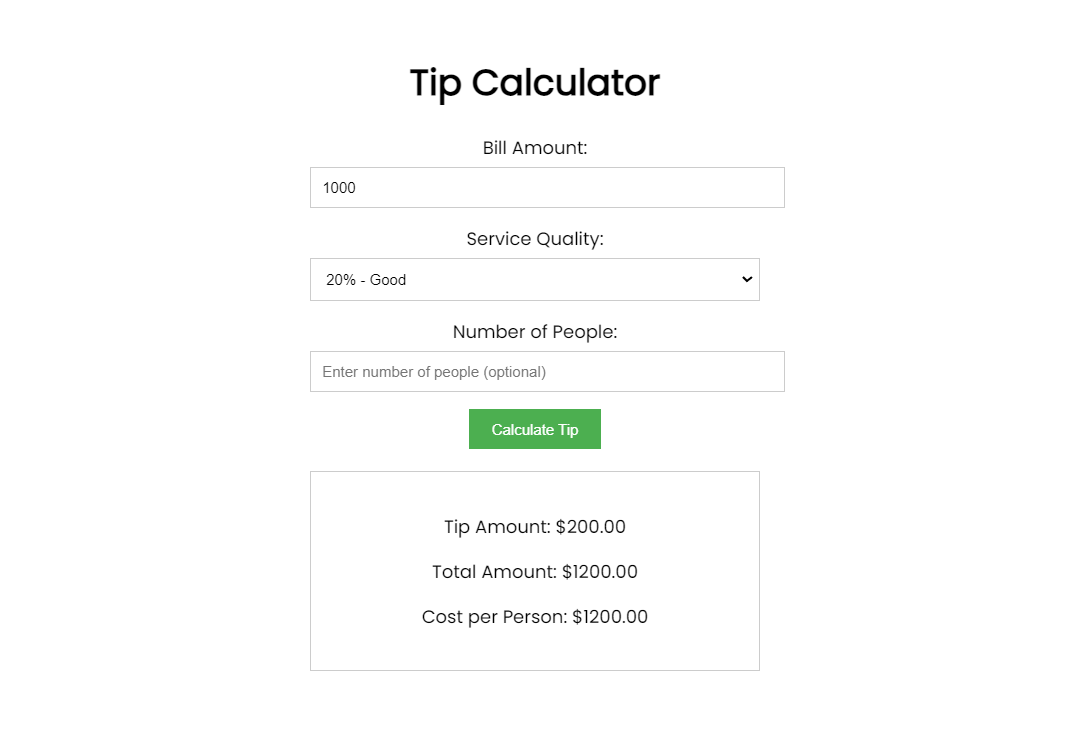
Today's project is a Tip Calculator. We'll be building a simple webpage that allows users to enter a bill amount, select the service quality, and optionally enter the number of people splitting the bill. Based on this information, the calculator will calculate the tip amount, total amount, and cost per person.
This project will introduce you to the fundamental building blocks of web development: HTML, CSS, and JavaScript. We'll break down each step involved in creating this interactive application.
Step 1: Understanding the Structure
Our web application will consist of three main parts:
HTML Structure: This forms the skeleton of our webpage, defining the content and layout.
CSS Styling: This adds visual appeal and defines how the elements are displayed on the screen.
JavaScript Functionality: This brings our webpage to life by adding interactivity and calculations.
Step 2: Building the HTML Structure
Let's create an HTML file (index.html) and start building the basic structure:
HTML
<!DOCTYPE html>
<html lang="en">
<head>
  <meta charset="UTF-8">
  <meta name="viewport" content="width=device-width, initial-scale=1.0">
  <title>Tip Calculator</title>
  </head>
<body>
  <h1>Tip Calculator</h1>
  <form id="tipForm">
    </form>
  <div id="results">
    </div>
</body>
</html>
This code defines the basic structure of our webpage. We have a head section containing essential information like character encoding and viewport settings. The body section contains the title, a heading for our application ("Tip Calculator"), a form element (<form>) for user input, and a div element (<div>) to display the calculated results.
Step 3: Creating the Form with HTML
Now, let's fill the form element with labels and input fields using HTML:
HTML
<form id="tipForm">
  <label for="billAmount">Bill Amount:</label>
  <input type="number" id="billAmount" placeholder="Enter bill amount">
  <br>
  <label for="serviceQuality">Service Quality:</label>
  <select id="serviceQuality">
    <option value="0">Select</option>
    <option value="0.2">20% - Good</option>
    <option value="0.15">15% - Okay</option>
    <option value="0.1">10% - Bad</option>
  </select>
  <br>
  <label for="numPeople">Number of People:</label>
  <input type="number" id="numPeople" placeholder="Enter number of people (optional)">
  <br>
  <button type="button" onclick="calculateTip()">Calculate Tip</button>
</form>
This code creates a form with three input fields:
A text field (
<input type="number">) labeled "Bill Amount" for users to enter the bill amount.A dropdown menu (
<select>) labeled "Service Quality" with options for different tip percentages.An optional text field for "Number of People" to split the bill.
Finally, a button (
<button>) that triggers the calculation when clicked. We've also added anonclickevent handler that calls thecalculateTip()function (which we'll define in JavaScript later).
Step 4: Styling the Webpage with CSS
Let's create a separate CSS file (style.css) to style our webpage and make it visually appealing. Here's an example:
CSS
body {
  font-family: "Poppins", sans-serif; /* Choose your preferred font */
  margin: 50px auto;
  width: 400px;
  text-align: center;
}

form {
  margin-bottom: 20px;
}

label {
  display: block;
  margin-bottom: 5px;
}

input,
select {
  width: 100%;
  padding: 10px;
  border: 1px solid #ccc;
  margin-bottom: 15px;
}

button {
  background-color: #4CAF50; /* Green color */
  color: white;
  padding: 10px 20px;
  border: none;
  cursor: pointer;
}

#results {
  display: none; /* Initially hide the results section */
  border: 1px solid #ccc;
  padding: 20px;
  margin-top: 20px;
}
Explanation:
Body Styling:
We set the
font-familyproperty to "Poppins", a popular sans-serif font (you can choose your preferred font).We add some margin (50px) around the content to center it on the page (
margin: 50px auto;).We set the width of the webpage content to 400px for better responsiveness.
We center the text content within the body (
text-align: center;).
Form Styling:
- We add some bottom margin (20px) to the form element for better spacing.
Label Styling:
We set the
displayproperty to "block" so each label appears on a separate line.We add some bottom margin (5px) to the labels for spacing.
Input and Select Styling:
We set the width of the input fields and select element to 100% of their container, making them fill the entire space.
We add some padding (10px) to the input fields and select element for better readability.
We define a border style with a solid line of color #ccc (light gray) around the input fields and select element.
We add some bottom margin (15px) to the input fields and select element for spacing.
Button Styling:
We set the background color of the button to a green color (#4CAF50).
We set the text color of the button to white for better contrast.
We add some padding (10px 20px) to the button for better click area and visual appeal.
We remove the default border from the button (
border: none;).We set the cursor style to "pointer" when hovering over the button to indicate a clickable element.
Results Section Styling:
Initially, we hide the results section by setting the
displayproperty to "none". This section will be displayed only after the calculation is performed.We add a border around the results section with a solid line of color #ccc (light gray) for visual separation.
We add some padding (20px) to the results section for better readability.
We add some top margin (20px) to the results section for spacing.
We covered the foundation of our Tip Calculator, building the HTML structure and adding some basic styling with CSS. Now, let's bring the magic to life with JavaScript!
Step 5: Adding Functionality with JavaScript
Create a separate JavaScript file (script.js) and link it to your HTML file using the <script> tag. Here's the JavaScript code that defines the calculateTip() function and handles the calculations:
JavaScript
function calculateTip() {
  const billAmount = parseFloat(document.getElementById("billAmount").value);
  const serviceQuality = parseFloat(document.getElementById("serviceQuality").value);
  const numPeople = parseInt(document.getElementById("numPeople").value) || 1;

  // Input validation (optional)
  if (isNaN(billAmount) || serviceQuality === 0) {
    alert("Please enter a valid bill amount and select service quality.");
    return;
  }

  const tipAmount = billAmount * serviceQuality;
  const totalAmount = billAmount + tipAmount;
  const eachPerson = totalAmount / numPeople;

  document.getElementById("tipOutput").textContent = tipAmount.toFixed(2);
  document.getElementById("totalOutput").textContent = totalAmount.toFixed(2);
  document.getElementById("eachOutput").textContent = eachPerson.toFixed(2);

  document.getElementById("results").style.display = "block";
}
Let's break down this code:
Function Definition: We define a function named
calculateTip()that executes when the "Calculate Tip" button is clicked (due to theonclickevent handler).Retrieving User Input: Inside the function, we use
document.getElementById()to access the values entered by the user in the form fields (billAmount,serviceQuality, andnumPeople). We convert the bill amount and service quality values to floating-point numbers usingparseFloat(). The number of people is converted to an integer usingparseInt(), with a default value of 1 if left empty.Input Validation (Optional): This section checks for valid input. You can comment it out if you don't want to implement basic validation yet. It checks if the bill amount is a number (using
isNaN()) and if the service quality is selected (not the default "Select" option). If not, it displays an alert message and exits the function.Calculations: We calculate the tip amount by multiplying the bill amount by the selected service quality percentage. The total amount is calculated by adding the tip amount to the bill amount. Finally, the cost per person is calculated by dividing the total amount by the number of people.
Updating the Results: We use
document.getElementById()again, but this time to access the elements where we want to display the calculated values. We usetextContentto set the content of the elements with IDstipOutput,totalOutput, andeachOutput. ThetoFixed(2)method formats the numbers to display two decimal places.Displaying the Results: Finally, we change the display style of the
resultselement from "none" to "block" usingdocument.getElementById("results").style.display = "block". This makes the results section visible after the calculation is complete.
Step 6: Running the Application
Save your HTML, CSS, and JavaScript files (index.html, style.css, and script.js) in the same directory. Open the index.html file in your web browser, and you should see your Tip Calculator application up and running!
Output:
Checkout the source on CodePen
Congratulations! You've built your first interactive web application using HTML, CSS, and JavaScript.
FAQ: Tip Calculator Project
- Can I build this project if I'm a complete beginner with no coding experience?
Absolutely! This Tip Calculator project is designed for beginners. We'll break down each step involved in creating the application, starting with the fundamental building blocks of HTML, CSS, and JavaScript. No prior coding experience is necessary.
- What tools do I need to build this Tip Calculator?
You can use any basic text editor (like Notepad or TextEdit) to write your code. However, using a code editor with features like syntax highlighting and code completion can make the process much easier. Popular options include Visual Studio Code, Sublime Text, and Atom.
- The calculator isn't working! What could be wrong?
There could be a few reasons why your Tip Calculator isn't working as expected. Here are some things to check:
Typos: Double-check your code for any typos, especially in variable names, function names, or file paths.
Missing files: Make sure all your HTML, CSS, and JavaScript files are saved in the same directory and linked correctly in your HTML file.
JavaScript errors: Open your web browser's developer console (usually accessed by pressing F12) and look for any error messages that might indicate problems with your JavaScript code.
- Can I add more features to this Tip Calculator?
Sure! This is a basic example, and you can definitely add more features to customize it. Here are some ideas:
Implement input validation to ensure users enter valid bill amounts and select a service quality level.
Allow users to customize the tip percentage instead of relying on pre-defined options.
Add the ability to split the bill automatically based on the number of people entered.
Include a tip history section to track previous calculations.
- Where can I find the code for this Tip Calculator project?
The code provided in the blog post showcases the core functionalities of the Tip Calculator. You can use this code as a starting point and modify it to implement additional features as you learn more about HTML, CSS, and JavaScript.


